Computers are always getting cheaper and cheaper. If you want to build the ultimate pwning machine, it will cost you a fraction of what it would have 6 or 7 years ago. However, with the economy being the downer that it is you still don't have any extra cash for an awesome looking case mod. Since having a plain case is not an option I have a way out. Before I start I would like to re-emphasize the
budget in the name of this post. I can get away with mine because I have a microwave-like mesh covering it. If you don't have anything obscuring vision you might not be able to get away with something this wallet friendly.
Here are the materials that you'll need for this. The things underlined are what I used.
-
black construction paper
-white translucent material
coffee filter, plastic bag-tape or glue
-pencil
-ruler
-way of making circles, compass,
coins or CD-exacto knife and/or scissors
-LEDs
-A computer case with some empty drive bays.
The process I'm about to explain presumes that you have three empty drive bays. If you don't you'll have to do a little bit of thinking for yourself. If you only have 1 or 2 empty drive bays, you could do names of companys, like Valve or Monster, instead of just the logo. Not as cool, but hey, maybe you should get a bigger case or less CD drives.
Here's the process for making the radioactive symbol
1.- Cut the construction paper to the size of the empty drive bays.
2.- Center the CD on the paper and trace both of the circumferences (circumfrii?).
3.- Center the penny and trace it, it should be slightly larger than the inside circumference of the CD.
4.- It is handy to put a dot in the very center for the next part.
5.- Using the ruler trace a line horizontally through the whole thing, then draw two more lines 60º from each other.
6.- Using all the lines you've drawn you should be able to trace out the radioactive symbol. Make it a little bit darker and then us the exacto knife to cut along the darkened lines.
7.- Cut out a piece of plastic bag or coffee filter slightly larger than a CD and attach it to the side of the construction paper with the lines drawn on it. If you don't have a mesh cover over where this is going to be, I recommend using the plastic bag, presuming it's not too wrinkled. The paper of the coffee filter looks blotchy when back lit but it isn't noticeable if there is a mesh over it.
If you are using a coffee filter glue works very well for attaching it, you'll want to use tape with the plastic bag.
8.- If you are going to back light this masterpiece you'll need to figure out the proper amount of LEDs and resistors so that you don't fry anything. Once you have them all connected to each other, just plug them into an empty power supply connector. Double check the voltage with a voltmeter to be sure you have the right wires. Make sure you insulate the wires on the LEDs since if they touch the case they cause a short and will shut off your computer.
If you don't know electricity well, get a friend who does to do this part for you.
In order for the LEDs to diffuse enough to make an even back light I found that it worked best to put a white piece of paper at the back of the empty drive bays and shine the LEDs at that. If they were pointed directly at the coffee filter/plastic bag they just made dots.
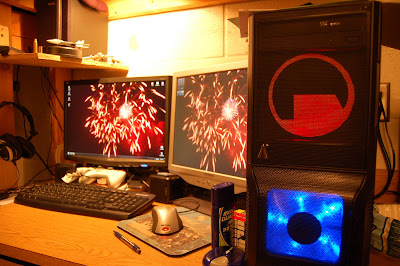
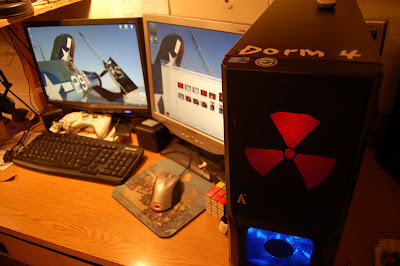
9.- You now have an awesome looking mod, from a distance, that cost you next to nothing that is also interchangeable. Don't feel like radiation today? maybe biohazard, Monster or Aperture Science.
10.- Brag to your friends, both online and off, that you now have a custom modded computer that can get girls to talk to you. Just be sure to let the camera shake a little if you're going to brag about it on forums so it looks all expensive and like the über pwnge machine that it is.
If you don't know what the logo done with the coffee filter is, go
buy half-life and play it. It's a little old but still awesome.
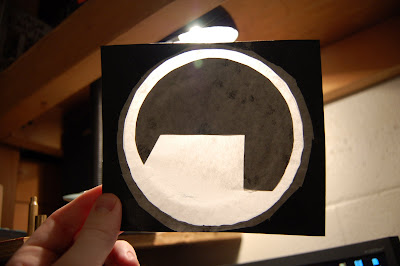
This is the coffee filter.
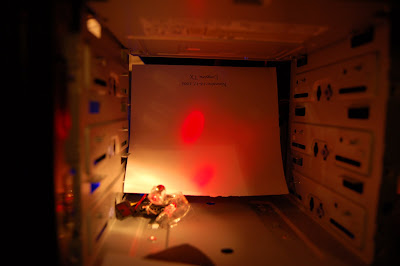
Here's how the back light is set up.
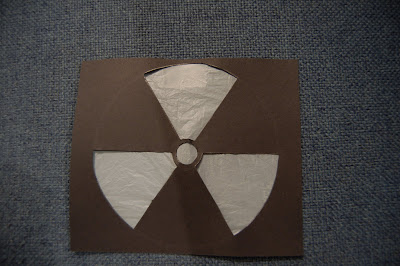
This is the plastic bag.


